Wednesday, June 12, 2013

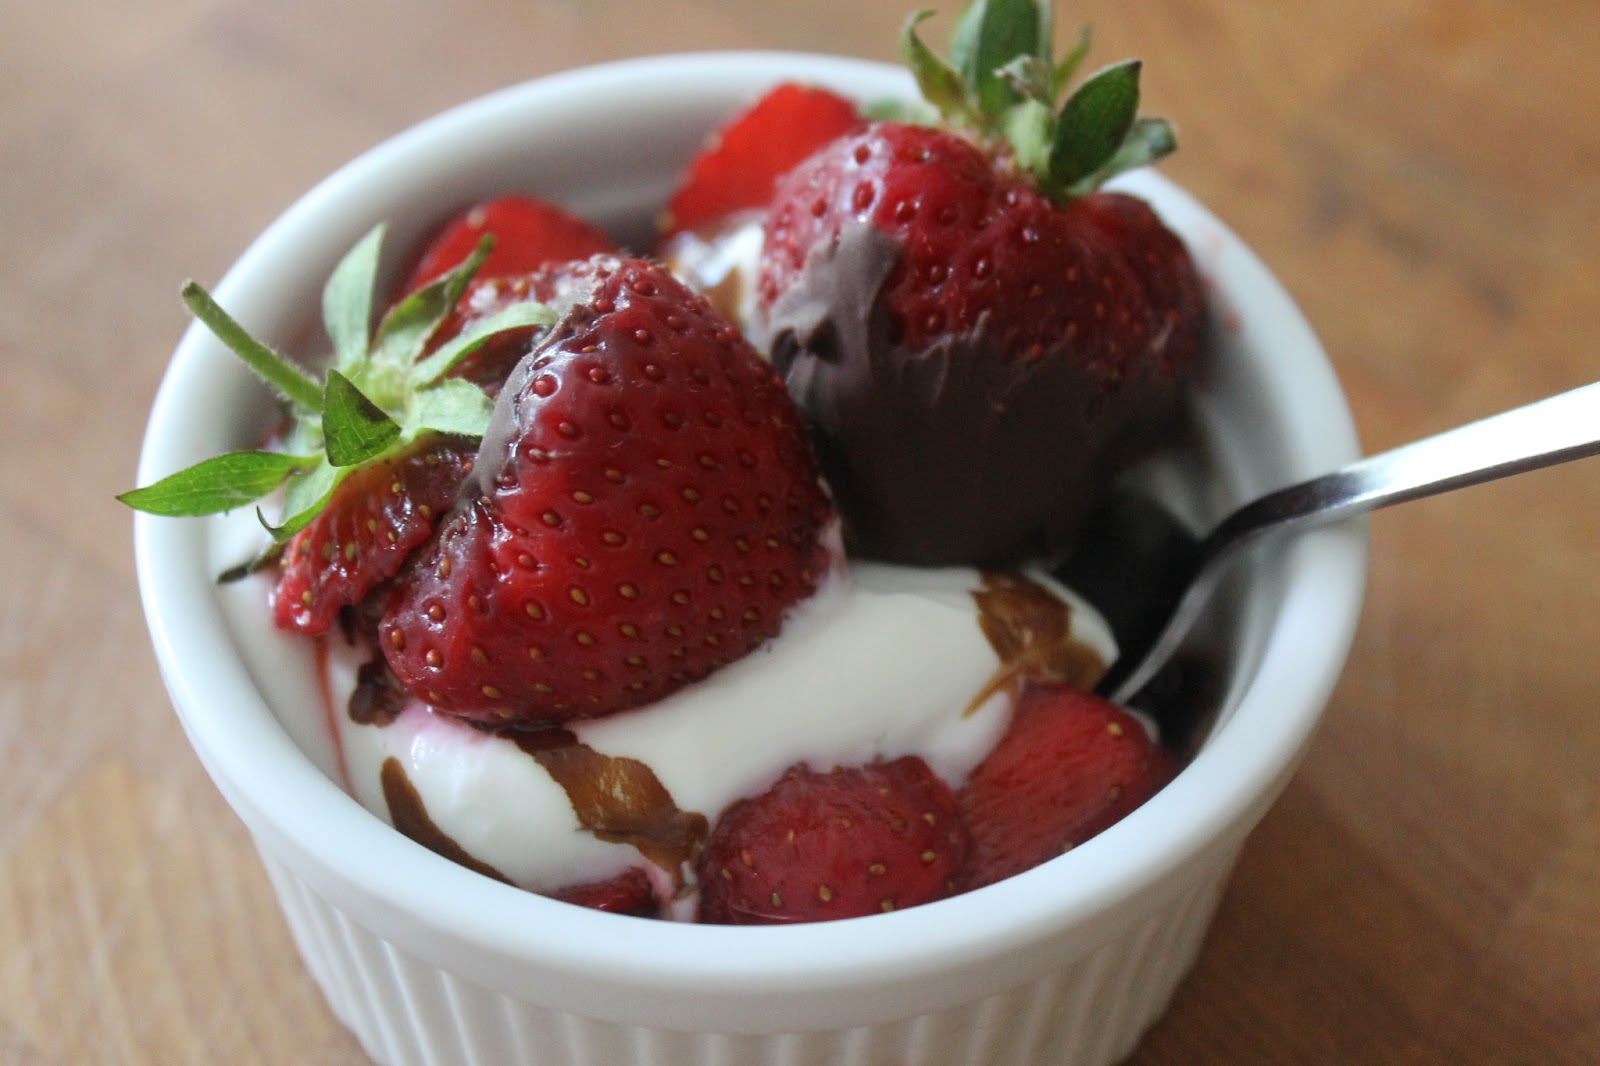
Strawberry, Yogurt, Honey and Balsamic Parfaits

Here is an easy recipe that gives you a great treat in no time at all. I made these the other day for dessert after getting some beautiful local strawberries at the farm stand.

Strawberry, Yogurt, Honey and Balsamic Parfaits  
Makes 2


Ingredients:
10-12 ripe strawberries-sliced thin but keep 2-4 strawberries whole
1 cup non-fat plain Greek yogurt
Honey or Agave-to taste
Balsamic glaze-optional but delicious
1/4 cup semi-sweet chocolate (I always suggest Ghiradelli chocolate)

1. Mix together yogurt and enough honey or agave to sweeten to your taste.

2. In a ramekin or other small serving dish, layer the bottom of the dish with some sliced strawberries, top with about 2 tbsp of yogurt mixture and drizzle with balsamic glaze. Continue to layer, sliced strawberries, yogurt and balsamic until you reach the top of your dish. Set aside in the refrigerator.

3.  In a small microwave safe bowl, melt the chocolate chips for 1 minute. Stir and continue to heat in 30 second intervals until melted and smooth. Do not over heat or it will get clumpy.

4. Dip 2-4 whole strawberries in chocolate and set aside on wax paper to dry. Once the chocolate is mostly hardened, place 1-2 chocolate covered strawberries on each parfait.


Monday, June 10, 2013

Tomato Veggie Sauce with Pasta

Something happened to my little girl around age one, she became a picky eater.  Every green item that I put on her plate (except avocados) would end up on the floor for the dog. Of course the dog doesn't like green things either so I would end up cleaning vegetables off the floor all the time. Once she developed a taste for certain flavors, getting vegetables in that belly became more of a challenge. I am always looking for ways to sneak some in her diet and that is why I thought this recipe was perfect.

Adding roasted vegetables to basic tomato sauce is a great way of getting nutritious items into your child's diet. This is a great recipe for adults as well. You can have this on any type of pasta or where ever else you would normally use tomato sauce. I made Layla different shaped pasta to keep her interest and it was very easy for her to feed herself with a fork. 

For myself, I am not a big pasta eater so I turned the leftover sauce into a tomato-vegetable soup. I will include that recipe below. It was delicious! 

In previous posts, I have recommended the book The Baby and Toddler Cookbook by Karen Ansel, MS, RD and Charity Ferreira. The book is very easy to navigate through and gives you recipe ideas from ages 6 months to 3 years old. The recipes are fun, healthy and help develop your child's palate. Along with the recipes, the book offers get information on when to introduce certain foods, as well as, great snack ideas. I will also add, that the recipes are great for adults too. You don't have to cook separate meals to appeal to kids and adults using this book. I would HIGHLY recommend buying this book if you enjoy cooking for your baby or toddler. 

Tomato Veggie Sauce with Pasta (recipe from The Baby and Toddler Cookbook)
Makes 3 1/2 cups of sauce


Ingredients:
1 small carrot-peeled in finely chopped
1 small zucchini- peeled in finely chopped
1/2 red pepper-seeded and finely chopped
1 tbsp olive oil
Salt and pepper
1/2 yellow onion-finely chopped
1 clove garlic-minced
1 large can of crushed tomatoes (28-32 oz)
1/4 vegetable stock or low-sodium chicken stock
Cooked dried pasta shapes, shells or penne for serving

1. Preheat oven to 400 degrees F. In a small roasting pan combine, carrot, zucchini, and bell pepper. Drizzle with 1/2 the olive oil and stir to coat. Sprinkle lightly with salt and pepper. Roast in oven for 20-25 minutes, stirring occasionally until they are tender. 

2. While the veggies are roasting, in a large saucepan over medium heat, warm remaining oil. Add in onion and garlic and saute until onion softens; about 5 mins. Add in tomatoes and broth, stir to mix well and simmer gently, uncovered, 15-20 minutes. Add in roasted veggies to the sauce. 

3. Let the sauce cool slightly, then transfer to food processor or blender and, working in batches if necessary, process until smooth or coarse puree, depending on the consistency you or your child prefers. Taste and adjust seasoning. 

4. To serve, toss the pasta with enough sauce to coat. Reserve remaining sauce for another use (such as vegetable soup below)
**Refrigerate the cooled sauce in air tight container for 3 days, or freeze for up to 3 months.


Round Two Recipe:
To make the roasted vegetable sauce into tomato vegetable soup, add the remaining sauce into a large sauce pan and add enough vegetable or chicken stock to a desired consistency for soup (between 2-3 cups) Add in chopped vegetables such as carrots, celery, green beans and simmer on low heat, partially covered, until vegetables are tender. Remove from heat and add in chopped fresh basil and sprinkle with Parmesan cheese. 

Friday, May 31, 2013

Lettuce Wrap Chicken Gyros with Green Tzatziki

I am writing this post minutes after finishing this meal. This was one of those nights when I tried a new recipe, it came out great and it was EXACTLY what I was in the mood to eat. This meal is not only very healthy for you, it is really easy! You can prepare everything ahead of time and just grill the chicken before you are ready to eat (you could even grill the chicken ahead of time too)

This recipe is a cross between a Greek salad and a chicken gyro. I thought this recipe came out so delicious that I would definitely make this for company or even a large quantity for a summer party. If you like the flavors of Greek food and want a healthy dinner...this is a great recipe to try. Enjoy!

**If you want to make this kid friendly, I would wrap the contents in a flour tortilla and maybe even add a little cheese.

**Also..like in most of the recipes I share, I like to omit raw garlic (which I did in this recipe) but I will add the full recipe below in case you would like to add it.


Chicken Gyro Lettuce Wraps with Tzatziki (Recipe adapted from Rachael Ray Magazine)
Serves 4


Ingredients:
2 lemons-juiced
2 cloves garlic (grated)
1/3 cup olive oil
1 tsp sumac or 1/2 tsp sweet paprika and 1/2 tsp smoked paprika, combined
1 tsp dried oregano
1 tsp ground coriander
1 1/2 tsp ground cumin (1 tsp for marinade and 1/2 tsp for tzatziki)
4 pieces skinless, boneless chicken breast
Salt and pepper
1/2 seedless cucumber (shredded)
1 cup plain Greek yogurt
1 cup fresh herb blend (parsely, dill, mint) **I used parsely, dill and basil
2 large romaine heads, separated into 4 portions
Garnishes: Chopped tomatoes and pepperoncini

1. Combine half the lemon juice, 1 clove garlic, 1/3 cup olive oil, sumac (or paprika combo), oregano, coriander and cumin. Season chicken with salt and pepper and place in marinade for at least 15 minutes.

2. Salt the shredded cucumber and let rest in a colander for 10 minutes. Press out excess liquid. In a food processor, combine the cucumber, yogurt, remaining juice from lemon, 1 clove grated garlic, 1/2 tsp cumin and fresh herbs. Puree, then season the tzatziki. (This can be made in advance)

3. Heat a skillet, griddle or grill pan over medium-high heat. Shake excess marinade off the chicken and place in the skillet; cook, flipping once halfway through, for 10 minutes or until cooked through. Slice the chicken on an angle. (If you have time, let the chicken rest for 5 minutes before slicing)

4. Serve the chicken with lettuce for wrapping and top with tzatziki, chopped tomatoes and pepperoncini.


Thursday, May 30, 2013

Good Health: Healthy seeds to add to your diet.

Whenever I come across an article that I find interesting or helpful I like to share it with you. The information below comes from Bon Appetit Magazine. It breaks down information on different healthy seeds available to you and why you may want to add them into your diet.

Personally, I have recently added Chia seeds into my everyday diet. I add about 3/4 tsp to 1 tbsp into my oatmeal every morning. It doesn't change the flavor but give my oatmeal a little texture, which I enjoy.


Flax: These seeds reduce inflammation and have cancer fighting powers of Omega-3 fatty acids. To get the most out of flaxseeds, eat them ground rather than whole, but because omega-3s are so perishable, it is best to grind the seeds just before using (use a spice or coffee grinder) Try these seeds in oatmeal or toast spread with nut butter.

Chia: If you add just one food to your diet, make it chia seeds. Suddenly trendy, they provide complete protein (great for vegetarians), omega-3s, fiber and calcium. They're flavorless, so it's easy to stir them into yogurt, oatmeal or smoothies. Be warned; these seeds take on a gelled consistency when added to liquids. Learn to love it.

Pumpkin: These seeds are a solid source of zinc which supports immune function. They are great toasted and tossed in with salads or soups.

Sesame: Rich in iron and calcium, these seeds are a nice finishing touch on rice dishes, roasted veggies and avocado on toast (best toasted in a dry skillet before adding to dishes) For the highest nutritional content, look for unhulled sesame seeds-think brown rice vs. white rice. You can find these are health food stores or middle eastern markets.

Hemp: Ideal for making delicious, creamy, and pleasently grassy flavored milk that pacts essential fats and amino acids. It is easy to do at home: blend one part hulled hemp seeds with four parts water and a touch of honey, then (if desired) strain. Pour it on cereal, coffee or anywhere else you would use milk.

Sunflower: These are great for baking. Use them to add antioxidents, which in sunflower seeds may help protect against cardiovascular disease. These also add wonderful texture to breads, granola, and cookies.


Thursday, May 23, 2013

The Worlds Most Dangerous Banana Bread

I was SO excited to see this recipe for banana bread in an issue of Bon Appetite Magazine. (see recipe below) Tom and I risked our lives to try this delicious bread on our honeymoon in Hawaii. We started off our vacation to Hawaii on the island of Kauai and ended in Maui.

While in Kauai, we met this nice couple who told us all about places to go when we visited Maui. One thing they mentioned was NEVER attempt to drive on the dangerous Kahekili Highway on the Northwest shore of Maui. Little did we know that on our exploration of the island that is exactly where we ended up.

We took a drive exploring the island and when we ended up on the beginning of this dangerous road we decided to give it a try. The road is VERY narrow with really steep drops. Only one car and fit by at a time on this highway, which allows cars to go both ways. If you ran into a car coming the opposite way, you would have to reverse into a small crevasse and let the other car pass before continuing on.

We continued down the road at about 5-10 MPH, experiencing the most beautiful views of untouched land. It took us hours but we came to a VERY small town called Kahakuloa. This town is home to about 100 native Hawaiians. It has no shops, except for one small road side stand called Julies Banana Bread. I remembered reading about this place in one of my guide books so we had to stop and give it a try.

You can only get a minimum of 2 loaves of bread so we bought them and headed back to the car for our long and dangerous drive back to the hotel. We each ate a slice of the moist and delicious banana bread and wanted to save the rest for later. We ended up finishing the first loaf before we started the car. The second loaf was devoured soon after. It was definitely an adventure worth risking our lives over. If we had ended up going over the edge, at least our last meal was Julie's famous banana bread. Thankfully, we made it back to the hotel just in time to enjoy the best pineapple we ever ate, which we picked up on the side of the very scary road. It was so ripe, you could cut it with a plastic knife or rip it open with your hands.....just like Tom.

Thanks to Bon Appetite Magazine for sharing this recipe so you can give this banana bread a try without the risk of falling off a cliff.

Kaheliki Highway 


Julie's Famous Banana Bread Stand
Recipe made at home: 3 mini loaves 


Best Pineapple in the world: Side of the road..Payment of honor system 


Layla enjoying Julie's homemade banana bread recipe 


Julie's Best Banana Bread
Makes One 9 x 5 x 3" loaf or Three 5 3/4 x 3 1/4" mini loaves

Ingredients:
Non stick vegetable oil spray (or Crisco) for greasing pan
1 3/4 cups all purpose flour
1 1/2 tsp baking soda
3/4 tsp kosher salt
3 large eggs
1 1/2 cups sugar
1 cup mashed ripe bananas (about 2 large)
3/4 cup vegetable oil

1. Preheat oven to 350 degrees F. Coat baking pan (One 9 x 5 x 3" loaf or Three 5 3/4 x 3 1/4" mini loaves) with non stick spray or Crisco. (I like to line the bottom of the pan with parchment paper for easy release) 

2. In a medium bowl, whisk together flour, baking soda and salt. 

3. In another bowl, whisk together eggs, sugar, mashed bananas and vegetable oil. Add dry ingredients to banana mixture and stir until just combined. Scrape batter into prepared pan and smooth top. 

4. Bake until a tester inserted into the center comes out clean, 60-70 minutes (or 40-50 minutes for mini loaves) Transfer to wire rack; let bread cool in pan for 15 minutes. Run a knife along the inside of pan to release the bread. Turn out onto wire rack and let cool completely. 

5. This bread can be made 3 days ahead. Store in airtight container.