Wednesday, January 22, 2014

The Best Gluten Free Chocolate Chip Muffins

I have not been posting very often these days, but when I come across a recipe that I feel I must share I am happy I still have this blog. We are snowed in this morning which means it is a perfect day to do some baking. It is getting easier and easier to bake with Layla who is now 2 years 5 months. Each time is a little less messy. I measure the ingredients and let her dump it in the bowl and mix it around. 

The good part about baking GF muffins with Layla, is all the flour we spill on the counter tops won't get me sick by cross contaminating. I came across a recipe from the blog Gluten Free Goddess for apple-cinnamon muffins and decided to adapt the recipe to the ingredients I had on hand in my kitchen. 

I am so amazed by the results. Typically, gluten free muffin recipes can be either too dry and crumbly or too doughy. These muffins come out so light and fluffy, you would never guess they were GF. The combination of buckwheat flour and sorghum flour make these muffins a healthier whole grain version of the usual all purpose flour muffin. I would use this muffin batter as a base and add in any of your favorite flavors. In these muffins, I did a combination of raisins and semi-sweet chocolate chips. Layla and I have already eaten two each :) 

Gluten Free Chocolate Chip Muffins
Makes 12 muffins


Ingredients:

3/4 cup GF buckwheat flour
1/2 cup sorghum flour
1/4 cup tapioca starch/flour
1 1/2 teaspoons baking powder
1 teaspoon baking soda
1/2 teaspoon sea salt
1 teaspoon xanthan gum
1 teaspoon cinnamon
1 cup  applesauce (I used original flavor) 
1/3 cup canola oil
3/4 cup organic brown sugar
1 1/2 teaspoons vanilla extract
2 eggs
1/4 cup of apple juice

1/3 cup semi-sweet chocolate chips
1/4 cup raisins-optional


1. Preheat the oven to 350ºF. Line a muffin tin with 12 paper liners. 

2. In a large mixing bowl, whisk together the dry ingredients from buckwheat flour to cinnamon


3. In another bowl, whisk together wet ingredients: apple sauce, brown sugar, vanilla extract, eggs and juice. 

4. Add wet ingredients into dry and mix until batter is smooth. Do not over mix. 

5. Mix in chocolate chips and raisins (or any other add-ins you prefer)

6. Using a standard size ice cream scoop, scoop batter into 12 muffin cups. 


7. Bake in preheated oven for 20-25 minutes (I baked mine for 22 mins) Test with a tooth pick to make sure they are cooked through and remove from oven. Let cool on a wire rack.8. You can freeze these muffins by wrapping them in plastic wrap once they are completely cool. 

Sunday, November 17, 2013

Homemade Milano Cookies

Okay, I have been putting this post off for months now and I decided I finally have to write the reasons why I haven't been posting all summer and now into fall, and if I am going to continue to post in the future.

The reasons I have not been posting are the following: I am pregnant and for the first 3 months I was so nauseous I could not think about cooking or writing about food. I was also so tired with this pregnancy that any free time I had, I spent napping.

I am now in my second trimester and feeling much better. I am looking forward to sharing some new recipes. Hopefully I will find some time to experiment and post between mommy and me classes and potty training. Just while writing this post I had to stop twice to chase a little naked butt around to make sure there were no accidents on the carpet.

I am coming back to you now with a recipe worth sharing (or at least I am told its worth it) Unfortunately, I wasn't able to taste these cookies because the original recipe isn't gluten free. However, I am planning on trying this recipe soon using a GF flour blend. (I will post that recipe if they come out good) 

These are my husbands favorite store bought cookies and he asked me to try them homemade. I found the recipe from Gale Gand on foodnetwork.com and gave it a try. They are pretty easy to make. You just have to have a piping bag and get the hang of piping them onto the parchment paper. My husband and daughter really enjoyed these cookies and I am definitely going to make them for the upcoming holidays. Enjoy!!

Homemade Milano Cookies (recipe by Gale Gand on foodnetwork.com)
Makes 25-30 cookie (sandwiches)


Ingredients: 
12 tablespoons butter, softened
2 1/2 cups powdered sugar
7/8 cup egg whites (from about 6 eggs)
2 tablespoons vanilla extract
2 tablespoons lemon extract
1 1/2 cups flour
Cookie filling, recipe follows
Cookie filling:
1/2 cup heavy cream
8 ounces semisweet chocolate, chopped
1 orange, zested (I did not add this ingredient) 


1. Preheat oven to 350 degrees F. Cream the butter with a paddle attachment then mix in the sugar. Add the egg whites gradually and then mix in the vanilla and lemon extracts.

2. Add the flour and mix until just incorporated. 

3. With a small (1/4-inch) plain tip, pipe 2-inch sections of batter onto a parchment-lined sheet pan, spacing them 2 inches apart as they spread. (I piped these in "Milano cookie" shapes but slightly thinner because they will spread) 

4.Bake in a preheated 350 degree oven for 9-10 minutes or until light golden brown around the edges. Let cool on the pan and transfer to baking rack. 

5. To make the filling:  In a small saucepan over medium heat, scald cream. Pour hot cream over chocolate in a bowl. Whisk to melt chocolate, add zest and blend well. Set aside to cool (the mixture will thicken as it cools). Spread a thin amount of the filling onto the flat side of a cookie while the filling is still soft and press the flat side of a second cookie on top. Repeat with the remainder of the cookies


Tuesday, July 9, 2013

Gluten Free Death By Chocolate

I haven't been posting much lately but I come back to you now with a recipe worth sharing for anyone who practices a gluten free diet. I have been making Death by Chocolate for years now, it is my go to dessert for parties and it is always a crowd pleaser. I decided to try a GF version and was really happy with the results. It is almost exactly the same the only difference is the GF chocolate cake mix is a bit more dense than the gluten cake mix. To balance it, I think adding a little more whipped cream to lighten it up works out great.

I used Betty Crocker Gluten Free Chocolate Cake Mix, Glutino Chocolate Sandwich Cookies (Oreo's) and Jello Instant Chocolate Pudding. The GF cake mix is half the size of the regular mixes in the store, so this recipe makes a smaller version. I would say it serves around 8 people.


Ingredients: 
1 box of chocolate gluten free cake mix, plus ingredients needed to prepare (the mix should make one 9" x 9" cake or 12 cupcakes)
1 package of chocolate pudding (you can use instant or cook and serve)
2 cups milk
1 pint of heavy cream (you may have a little extra whipped cream)
2 tbsp powdered sugar
1 tsp vanilla
15 chocolate sandwich cookies-crushed
Strawberries, raspberries or blueberries-optional 

1. Bake cake according to instructions on box and cool completely. You can bake any size cake, its going to be crumbled once it is cooled. You can make the cake a day ahead of time and store at room temperature in air tight container.

2. Make chocolate pudding according to instructions on box. Place in refrigerator to cool and set.

3. When the pudding is ready and the cake has cooled make the whipped cream. In a mixer, add in heavy cream and whip on medium-high until it begins to thicken. Add in sugar and vanilla and continue to whip until stiff peaks form. (You may have some extra whipped cream)

4. To assemble Death by Chocolate use a trifle dish or large serving bowl and start to layer ingredients. Start by crumbling 1/3 of cake on the bottom of dish, spoon 1/3 of pudding on top of cake and spread evenly, add 1/3 of whipped, add a thin layer of crushed cookies cookies (add berries, if using) and continue to layer ending with whipped cream and cookies.


Wednesday, June 12, 2013

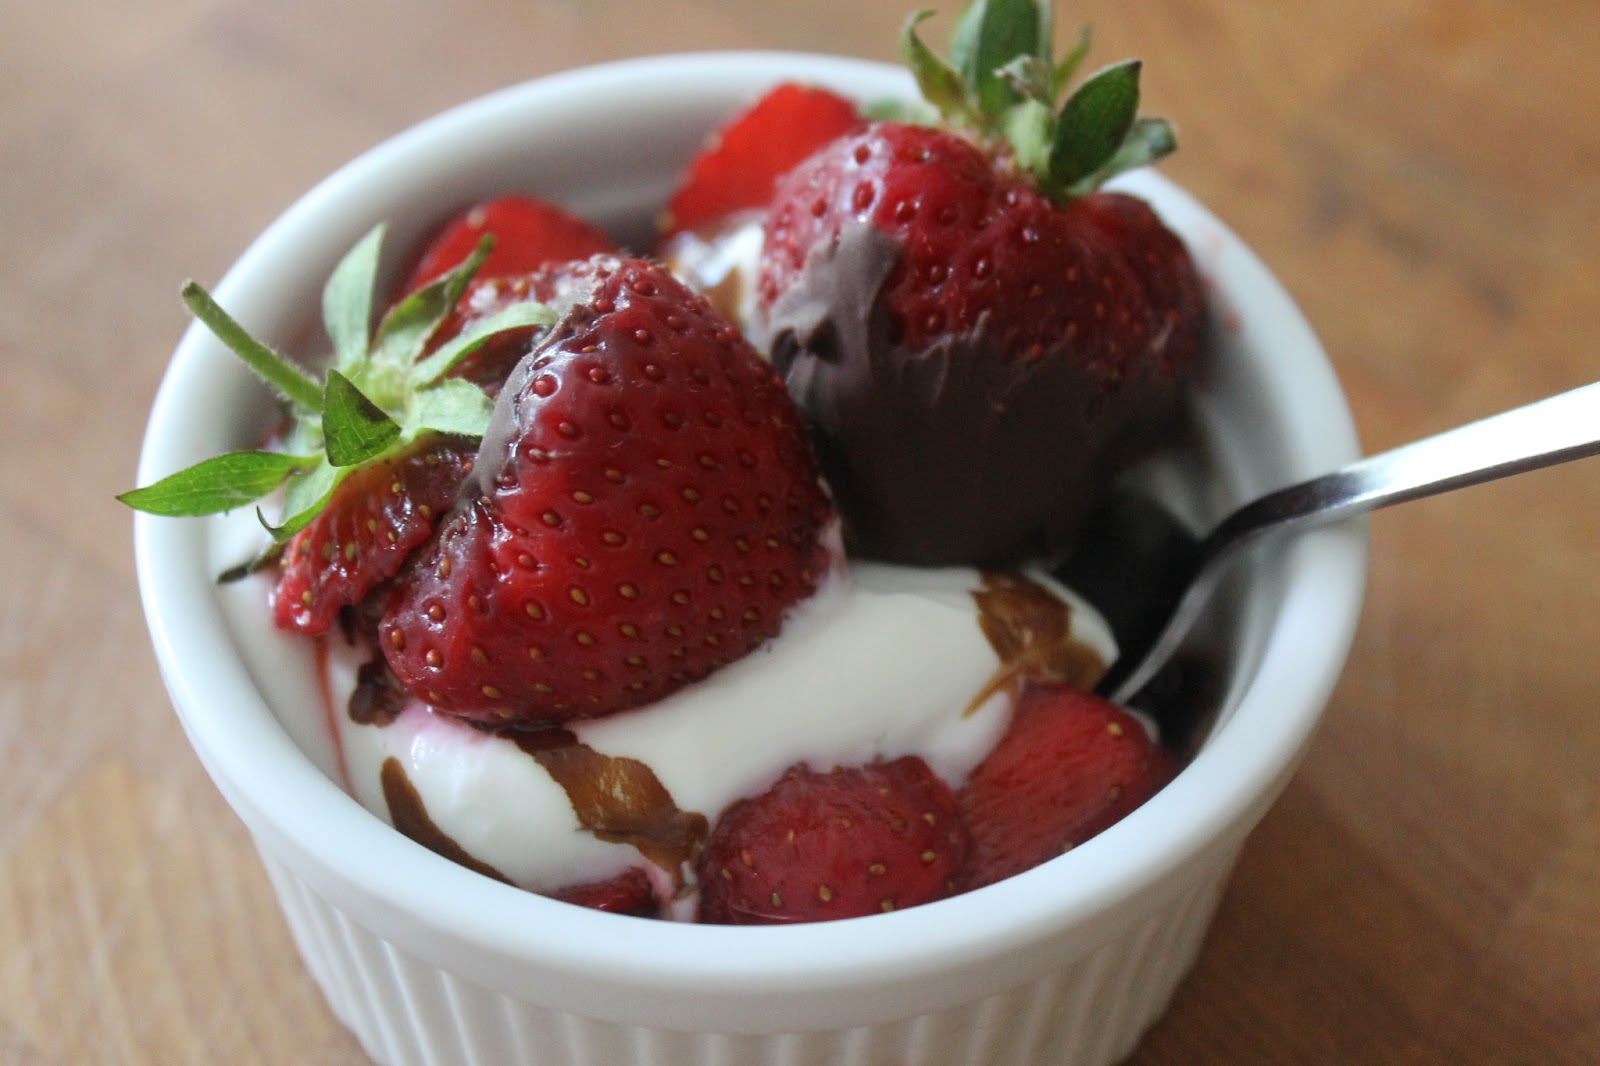
Strawberry, Yogurt, Honey and Balsamic Parfaits

Here is an easy recipe that gives you a great treat in no time at all. I made these the other day for dessert after getting some beautiful local strawberries at the farm stand.

Strawberry, Yogurt, Honey and Balsamic Parfaits  
Makes 2


Ingredients:
10-12 ripe strawberries-sliced thin but keep 2-4 strawberries whole
1 cup non-fat plain Greek yogurt
Honey or Agave-to taste
Balsamic glaze-optional but delicious
1/4 cup semi-sweet chocolate (I always suggest Ghiradelli chocolate)

1. Mix together yogurt and enough honey or agave to sweeten to your taste.

2. In a ramekin or other small serving dish, layer the bottom of the dish with some sliced strawberries, top with about 2 tbsp of yogurt mixture and drizzle with balsamic glaze. Continue to layer, sliced strawberries, yogurt and balsamic until you reach the top of your dish. Set aside in the refrigerator.

3.  In a small microwave safe bowl, melt the chocolate chips for 1 minute. Stir and continue to heat in 30 second intervals until melted and smooth. Do not over heat or it will get clumpy.

4. Dip 2-4 whole strawberries in chocolate and set aside on wax paper to dry. Once the chocolate is mostly hardened, place 1-2 chocolate covered strawberries on each parfait.


Monday, June 10, 2013

Tomato Veggie Sauce with Pasta

Something happened to my little girl around age one, she became a picky eater.  Every green item that I put on her plate (except avocados) would end up on the floor for the dog. Of course the dog doesn't like green things either so I would end up cleaning vegetables off the floor all the time. Once she developed a taste for certain flavors, getting vegetables in that belly became more of a challenge. I am always looking for ways to sneak some in her diet and that is why I thought this recipe was perfect.

Adding roasted vegetables to basic tomato sauce is a great way of getting nutritious items into your child's diet. This is a great recipe for adults as well. You can have this on any type of pasta or where ever else you would normally use tomato sauce. I made Layla different shaped pasta to keep her interest and it was very easy for her to feed herself with a fork. 

For myself, I am not a big pasta eater so I turned the leftover sauce into a tomato-vegetable soup. I will include that recipe below. It was delicious! 

In previous posts, I have recommended the book The Baby and Toddler Cookbook by Karen Ansel, MS, RD and Charity Ferreira. The book is very easy to navigate through and gives you recipe ideas from ages 6 months to 3 years old. The recipes are fun, healthy and help develop your child's palate. Along with the recipes, the book offers get information on when to introduce certain foods, as well as, great snack ideas. I will also add, that the recipes are great for adults too. You don't have to cook separate meals to appeal to kids and adults using this book. I would HIGHLY recommend buying this book if you enjoy cooking for your baby or toddler. 

Tomato Veggie Sauce with Pasta (recipe from The Baby and Toddler Cookbook)
Makes 3 1/2 cups of sauce


Ingredients:
1 small carrot-peeled in finely chopped
1 small zucchini- peeled in finely chopped
1/2 red pepper-seeded and finely chopped
1 tbsp olive oil
Salt and pepper
1/2 yellow onion-finely chopped
1 clove garlic-minced
1 large can of crushed tomatoes (28-32 oz)
1/4 vegetable stock or low-sodium chicken stock
Cooked dried pasta shapes, shells or penne for serving

1. Preheat oven to 400 degrees F. In a small roasting pan combine, carrot, zucchini, and bell pepper. Drizzle with 1/2 the olive oil and stir to coat. Sprinkle lightly with salt and pepper. Roast in oven for 20-25 minutes, stirring occasionally until they are tender. 

2. While the veggies are roasting, in a large saucepan over medium heat, warm remaining oil. Add in onion and garlic and saute until onion softens; about 5 mins. Add in tomatoes and broth, stir to mix well and simmer gently, uncovered, 15-20 minutes. Add in roasted veggies to the sauce. 

3. Let the sauce cool slightly, then transfer to food processor or blender and, working in batches if necessary, process until smooth or coarse puree, depending on the consistency you or your child prefers. Taste and adjust seasoning. 

4. To serve, toss the pasta with enough sauce to coat. Reserve remaining sauce for another use (such as vegetable soup below)
**Refrigerate the cooled sauce in air tight container for 3 days, or freeze for up to 3 months.


Round Two Recipe:
To make the roasted vegetable sauce into tomato vegetable soup, add the remaining sauce into a large sauce pan and add enough vegetable or chicken stock to a desired consistency for soup (between 2-3 cups) Add in chopped vegetables such as carrots, celery, green beans and simmer on low heat, partially covered, until vegetables are tender. Remove from heat and add in chopped fresh basil and sprinkle with Parmesan cheese.